
April 2, 2021
Freiya's Health & Fitness Journey
FREIYA REEF
I spent my early 20s struggling with chronic back pain, which limited many aspects of my life. Most days it was manageable but even on the good days I would have to be cautious about how I chose to spend my time.
The low seats in the cinema aggravated my back so I couldn’t go to the movies; I could drive but if I sat in the car for too long I’d struggle to get out and walk afterwards; I could walk long distances but once my back tired out I’d struggle to move again after I had stopped. Even sleeping was difficult- on a bad night I’d have to wake up and move my bedding every time I needed to change positions, because it was too painful to move underneath my quilt. I often struggled to lie flat so sometimes had to sleep with pillows under my knees to stop the pain getting too intense.
I went to many different physios, osteopaths, doctors, etc. but nothing really seemed to work. I did back care yoga where I was half the age of the rest of the group but still had to have some of the movements modified because I just couldn’t manage them. I remember crying during that first yoga class and having to go for a walk afterwards before I could fold myself back into the car.
I had to get a friend to take the bus into town once to drive my car home from a physio appointment because I didn’t think I would be strong enough to put the clutch in. My friends got used to me bailing on activities because I didn’t think I’d be up to it, or taking myself off to do some stretching in a quiet corner if I’d managed to make it out.
I really struggled to talk about it too, it was embarrassing and uncomfortable, and since nothing seemed to make any difference I had given up on going to specialists. Fortunately, one of my housemates got sick of me limping around the house and made me book in to see a physio who specialised in pain.
Dave Moen of Form Physiotherapy
helped me to learn about pain and the relationship that it had with my body. I learnt about what my body was capable of and how to move past my mental barriers and challenge myself physically. After a while I was ready to face the world and joined Freedom Fitness.
In the beginning I stuck to a program that Pete put together for me after consulting with Dave. This was a really fun way for me to start exploring more of what my body could do and I got a real kick out of it, but soon I was ready for more and that’s where Stephanie took over! Initially I started off with Steph writing programs for me and keeping an eye on me to make sure that I was doing things properly and not skipping reps (which I would never do- don’t listen to her!) Once I was feeling more confident with that I progressed to PT sessions with Steph who could push me harder than I could possibly push myself, and absolutely demolishing those old ideas that I had about my body and what it was capable of doing. Stephanie enabled me to access a strength in my body that I had no idea existed. Now I work with Zina and that has come with a whole bunch of new challenges as I incorporate more cardio (and coordination!) and don’t get to stop until I’m so puffed I can’t even talk- no mean feat!
When Dave the physio first encouraged me to join a gym I was really reluctant. I couldn’t see the appeal of working out in public and I had an image of gyms in my head that was not at all positive. But Dave recommended Freedom Fitness anyway, saying that it was a friendly place and not filled with intimidating people in lycra! I’m so glad he did! Freedom has been a place where I’ve been able to make friends, enjoy myself and learn more about the strength of my body than I ever thought possible!
I moved house a little while ago and briefly changed gyms to one that was more convenient, but nothing felt the same and I soon decided that the relaxed friendliness of Freedom was worth the extra time in the car each day. If you had told me three years ago that I’d be working out multiple times a week, that I did boot camp and saw a PT regularly, I’d probably have laughed in your face and then felt really sad, because I’d come pretty close to accepting that the pain was going to be an ongoing part of my life but I certainly wasn’t happy about it!
Fortunately, I’ve had an opportunity to carve out a different path and learn new and exciting ways to push my boundaries and strengthen myself both mentally and physically. The people here at Freedom Fitness have been a huge part of that, encouraging and supporting me all the way. What a bunch of legends!
It’s been an amazing journey for me, and I look forward to continuing on to the next challenge- which, knowing Zina, will probably have an animal name and require much more coordination than I am generally capable of… But I’m nailing the inchworms now, so she can bring it on!

Barbell & Trap Bar Training
In this bulletin we discuss Lactate & Brain Health. . .
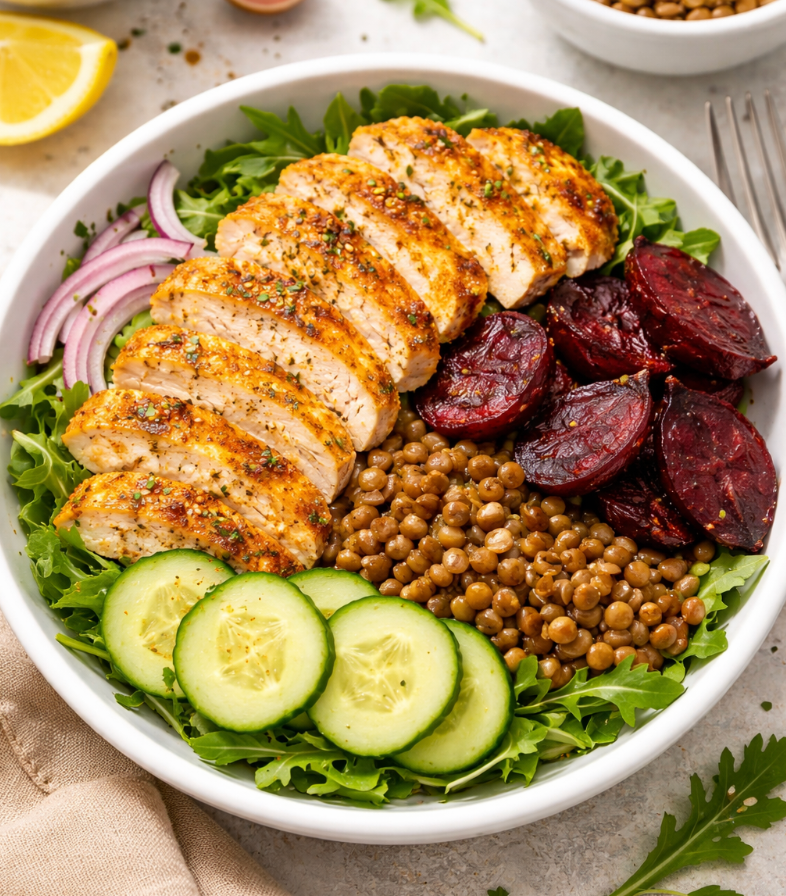
Ingredients 700–800g chicken breast (raw) 2 cups cooked lentils 3–4 small beetroot (about 400g total) 6–8 cups rocket (arugula) or spinach 2 cucumbers (sliced) 1 small red onion (thinly sliced) 2 tsp olive oil (total) Juice of 1–2 lemons Spice rub 2 tsp turmeric 2 tsp paprika 3 garlic cloves (minced) Salt + black pepper Method Step one - Cook The Chicken Coat chicken with spices and garlic. Grill, bake, or pan-cook with minimal oil until cooked through. Slice. Step two - Prepare The Beetroot Roast at 200°C for ~30–40 min (or use pre-cooked), then slice. Step Three - Build The Bowl Divide greens, lentils, beetroot, cucumber, and onion across 4 bowls. Top with protein Add sliced chicken evenly. Step four - Dress It Lightly Drizzle olive oil and lemon juice over each bowl. Step five - Serve & Enjoy Toss lightly if desired, or keep layered for presentation. Serve immediately while the chicken is warm for the best flavour. Nutritional Information & Cooking Times Prep time: 15 minutes Cook time: 35 - 40 minutes 450 kcal | 7g Fat | 53g Protein | 37g Carbohydrates